Showing posts with label Glue-Tastic. Show all posts

Tuesday, October 16, 2012

You'll poke your eye out...

I am going to do something that I do not do very often. I am going to talk about a #PinterestSuccess.
I know right. Typically, I think the original pinners are just messing with us and waiting to see how many #PinterestFail they can get people to do ( like this one. ) Well not this time!  
No-sir-e-bob! 
This one was too easy to mess up!

I found this idea on Pinterest and thought huh, that looks easy and cheap. I'm down!
A quick trip to DollarTree (where everything's $1) and a quick round of up of supplies and this is what I came up with:


This little creepy Halloween DIY cost a total of $3.
I had black spray paint & hot glue on hand already, then bought the creepy bird, rubber snakes, and small wreath. BOO(m)! <-- see what I did there. Yea, I'm witty like that. Success!


Sunday, December 4, 2011

I'm melting! melting! Oh, what a world!

Here I will share my little step by step on how to do one of those 
charming melted crayon on canvas art projects. 

I decided Dollface could use something pretty for her empty walls. I let her pick everything from start to finish. 

AND I even remembered to take LOTS of pictures along the way. Yay me!, right? ... you'll see...
*****************************************************

Step 1- Give the child canvas and paint and get the heck out of dodge.


Step 2: Let her work of art dry and pick out your colors. Dollface was digging the garden look and wanted to do greens for flower stems. Easy Peasy. Time to bust out the crayola stash from the back to school sale when crayons were like .25 each. Now the kids will be happy. The crayon basket has been replenished. Just hope they have no need for greens anytime soon.


Step 3: Attempt to come up with a pattern with the colors found. Then allow child to come along arrange them her own way. Clearly she knows best.


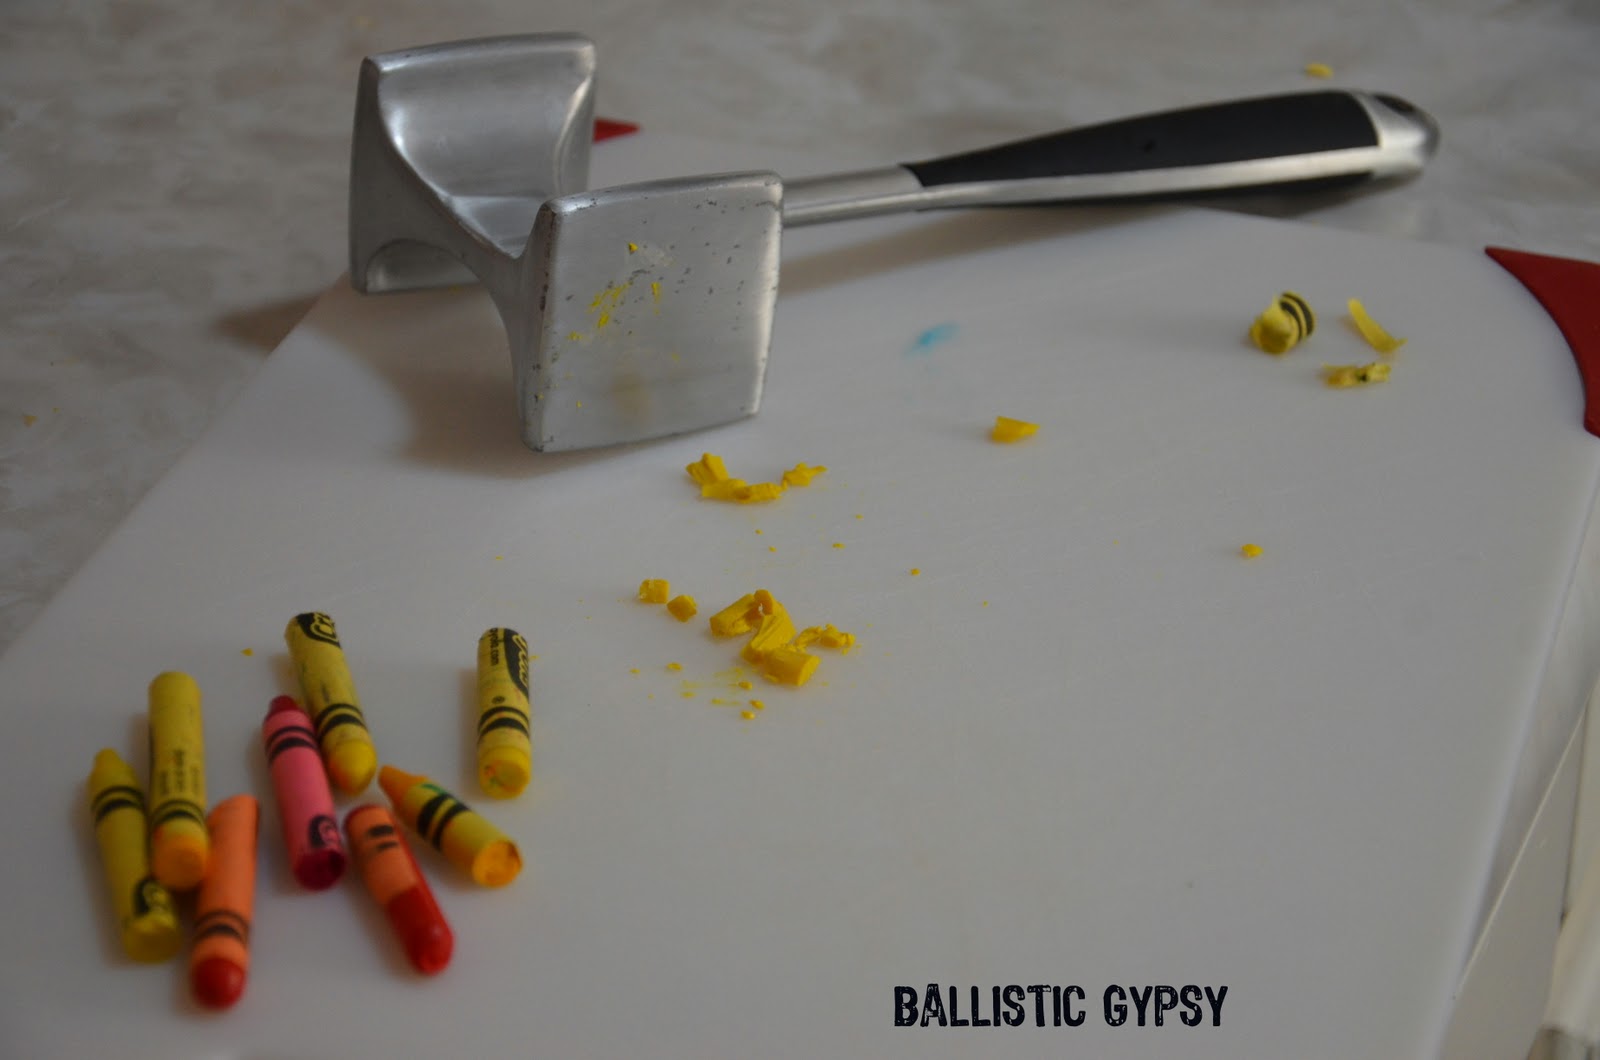
Step 4: She decides that no garden is complete without the sun shining down. So gather up some yellows and oranges and bash the crap out of them to melt in the microwave.


Step 5: Glue the crayons on canvas. We used a hot glue gun. It seemed to work wonderfully.

Step 6: Get your hairdryer and go to town melting these bad boys. I did notice that HOT on HIGH works best, but it also causes a bit of a splatter effect. I used my COOL button for bursts of cool air to stop some of the melted color from going further than I wished it to.
Step 7: DO NOT ALLOW YOUR CHILD TO TALK YOU INTO ADDING A SUN. 
I REPEAT, DO NOT FALL FOR THE CUTENESS. DO NOT DO AS I HAVE DONE!

 Step 8: Try like hell to get that orange eye sore off the pretty canvas! Do it now and do it fast.

Step 9: To Late. The damage is done.


Step 10: On a new canvas, repeat the first 6 steps. Skip step 4. SKIP STEP FOUR!!!


Tuesday, March 8, 2011

Something + Glue = Rad

With Gorilla Glue in your corner, the creative possibilities are endless. 
(  I  love  this  stuff  !  )


Who doesn't love a trip to Goodwill? or any thrifty store for that matter?
I especially love finding cute saucers or dessert plates and a pretty or just interesting candlestick. Since my spray paint is always near by, I have even painted plates or the sticks before gluing. -- No really, I think I have a problem when it comes to spray paint... 


This little dish I keep in my bathroom. Its perfect when I need a place to sit all those odd things I pick up and put in my pocket throughout the day. 
(tutorial on scrabble charm to come)


With this one, I only painted the plate. I love the design on the edge :)


This one is in  my daughters room. I {heart} it so much!


No paint, just ran it through the dishwasher to get the Goodwill funk off it & Gorilla Glues the candlestick to the bottom of the plate. (fyi the frame that you hardly see was another Goodwill find. I painted and made it match her room. yay!)